We use the ListView widget for showing items in rows or columns with the scroll. Here you will learn about what is a ListView widget, why you need them, and how you can create a static, dynamic (using builder) ListView which can scroll horizontally and vertically with some advanced tips.
In this Article
What is a Flutter ListView?
ListView is a flutter widget that let your set of widgets appear in a scrollable list. The widgets are placed linearly one after another in the scroll direction. It makes a list of items scrollable.
ListView is basically a CustomeScrollView that has a single SliverList in its CustomScrollView.slivers property.
There are four types of list view constructors.
- ListView()
- ListView.builder()
- ListView.separated()
- ListView.custom()
You will explore each type of ListView (constructor) in-depth in this Flutter ListView tutorial guide.
Where we can use ListView?
ListView can be used anywhere you want to show a linear list of widgets with scroll functionality.
For example:
You have a settings page in your app where you want to show the settings tile in a vertical list. You can place the widget Vertically by using Column().
But,
You can’t scroll widgets inside the Column(). That’s why you have to use a ListView() widget to make the list items scrollable.
ListView Properties
ListView has 19 different types of properties that you can specify using above mentioned four types of named constructors (ListView(), ListView.builder(), ListView.separated, ListView.custom).
| Property | Description |
| scrollDirection | You can pass Axis.vertical or Axis.horizontal for scroll direction of your ListView widgets. |
| reverse | Default value is false but you can make it true. For reversing the order of the list. |
| controller | ScrollController() that we can attach to the ListView() for controlling the scroll. |
| primary | You can pass true or false and make ListView primary. |
| physics | You can pass any ScrollPhysics() like: AlwaysScrollableScrollPhysics() BouncingScrollPhysics() ClampingScrollPhysics() FixedExtentScrollPhysics() NeverScrollableScrollPhysics() PageScrollPhysics() RangeMaintainingScrollPhysics() |
| shrinkWrap | ListView usually take the whole space of the page. You can change that behavior by assigning true or false to this property. |
| padding | You can pass EdgeInsets to add padding here. |
| itemExtent | itemExtent is the area that widgets cover in the scroll direction. It is efficient to specify itemExtent because when scrolling the upcoming widget size is known by ListView through itemExtent property. You can pass double values that will take space in the horizontal or vertical direction according to the scroll direction. |
| prototypeItem | Just like itemExtent, you can use prototypeItem to specify the extent or area covered by the children of the ListView widget. Here you will create a widget in which you specify the prototype format or structure of the actual child so that Flutter knows how much size this child item takes in ListView. |
| itemBuilder | itemBuilder property is used inside the ListView.separated() and ListView.builder() constructors. This is used to create an on-demand ListView items widget.itemBuilder gives us the context (BuildContext) and index (int). Here index is an int whose value is limited according to the value that you specify to the itemCount.(You specify your dart List variable-length most of the time.) |
| findChildIndexCallback | findChildIndexCallback is used to find the index of child widgets by using keys. You can use it inside ListView.builder() and ListView.separated(). Check this Dartpad working example from this conversation. |
| itemCount | itemCount is used inside the ListView.builder() or ListView.separated(). Here you define the length of the ListView by giving an integer value. This number limits the length of the ListView. |
| addAutomaticKeepAlives | You can pass true or false in this property. Actually, you are telling the Flutter framework that wraps each child of ListView inside the AutomaticKeepAlive widget. By default addAutomaticKeepAlives value is true. But if you make it false it will garbage collected off-screen widgets and off-screen widgets will no longer stay alive even if they are lazy lists. |
| addRepaintBoundaries | The default value is true which is efficient most of the time because it creates a separate display list by wrapping it inside the RepaintBoundary. If you pass false to the addRepaintBoundries then it is only efficient if your use case is to repaint the children during scrolling. |
| addSemanticIndexes | Here default value is also true. Basically, it warps children inside the IndexedSemantics which will give a semantic index to each element of the ListView so that the painted UI part has some meaning. |
| cacheExtent | Scrolling views have leading and trailing edges. You can specify cacheExtent or an area above and below the leading and trailing edges. If you give cacheExtent a double value then it will build the off-screen widgets that lie in that cache extent. |
| semanticChildCount | You can pass semanticChildCount int value to ListView() and ListView.builder(), ListView.custom() to specify the number of children that will contribute to the semantic information of the ListView(). |
| dragStartBehavior | It determines the way how drag will work when you start dragging inside the ListView.The default value is DragStartBehavior.start and you can pass DragStartBehavior.down which makes your scrolling experience more reactive.Add the dragStartBehavior property and check the app’s scrolling behavior. |
| keyboardDismissBehavior | It takes ScrollViewKeyboardDismissBehavior enum manual or onDrag value. The default value is manual but if you change it to the onDrag then your keyboard will disappear when you drag down your ListView. For example, if you create TextField inside the ListView, when you tap on the TextField a keyboard will appear and when you scroll down the keyboard will disappear. |
| restorationId | RestorationManager restores the state of the Flutter app. restorationId takes String and persist its current scroll offset of ListView and restores it during state restoration. |
| clipBehavior | We use clips to fasten something. Here you can pass Clip enum value. These can be : Clip.antiAlias – smooth jagged edges when clipping the content. Clip.antiAliasWithSaveLayer – while antiAlias clipping it also saveLayer immediately. Very slow and rarely used. Clip.hardEdge – default value. Fast but slower then Clip.none. Clip content and don’t apply antiAlias (edge smoothing).Clip.none – No performance cost. It will not clip the content. |
Simple ListView in Flutter
ListView() widgets are used to create a simple ListView in Flutter. It is useful if you have a small number of elements (widgets). You can fully customize the ListView() widget but first, check its basic usage.
Basic Implementation of ListView()
ListView() has the children property which can hold the list of Widgets.
Here, you can use any widget for creating a list view.
ListView(
        children: const [
          widget,
          widget,
        ],
      ),
How to Create Simple ListView in Flutter?
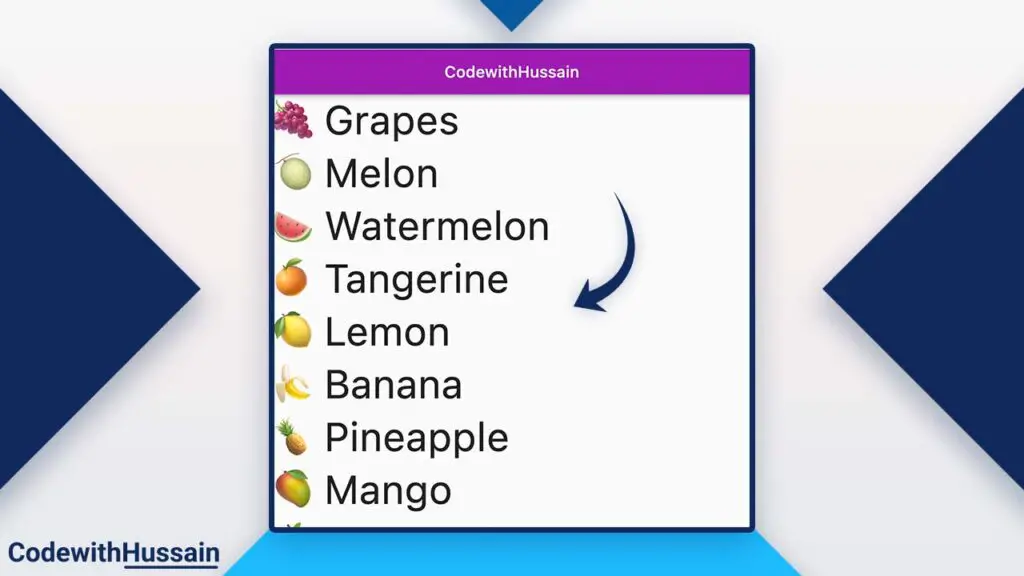
In this Flutter example, you will create a simple ListView in Flutter.
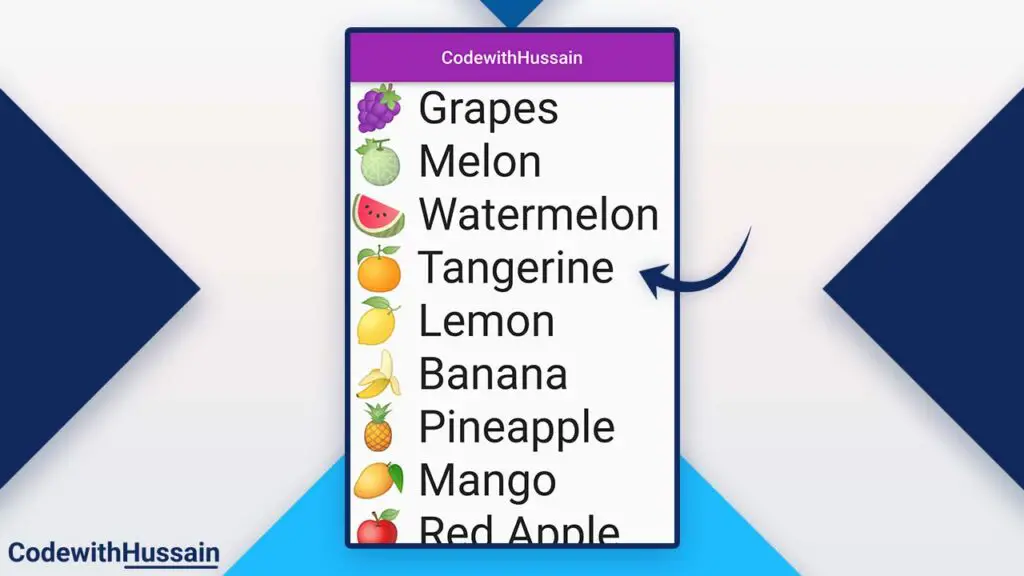
Here, you will use Text widget as the children of the ListView.
ListView(
        children: const [
          Text('🍇 Grapes', style: _style),
          Text('🍈 Melon', style: _style),
          Text('🍉 Watermelon', style: _style),
          Text('🍊 Tangerine', style: _style),
          Text('🍋 Lemon', style: _style),
          Text('🍌 Banana', style: _style),
          Text('🍍 Pineapple', style: _style),
          Text('🥭 Mango', style: _style),
          Text('🍎 Red Apple', style: _style),
          Text('🍏 Green Apple', style: _style),
        ],
      ),
const represents that the children of the ListView are constant.
const _style = TextStyle(fontSize: 50);_style variable is used to increase the size of the ListView Text widget children.
Complete Widget Code:
import 'package:flutter/material.dart';

class ListViewTutorial extends StatelessWidget {
  const ListViewTutorial({Key? key}) : super(key: key);

  @override
  Widget build(BuildContext context) {
    const _style = TextStyle(fontSize: 50);
    return Scaffold(
      appBar: AppBar(
        title: const Text('CodewithHussain'),
        centerTitle: true,
      ),
      body: ListView(
        children: const [
          Text('🍇 Grapes', style: _style),
          Text('🍈 Melon', style: _style),
          Text('🍉 Watermelon', style: _style),
          Text('🍊 Tangerine', style: _style),
          Text('🍋 Lemon', style: _style),
          Text('🍌 Banana', style: _style),
          Text('🍍 Pineapple', style: _style),
          Text('🥭 Mango', style: _style),
          Text('🍎 Red Apple', style: _style),
          Text('🍏 Green Apple', style: _style),
          Text('🍇 Grapes', style: _style),
          Text('🍈 Melon', style: _style),
          Text('🍉 Watermelon', style: _style),
          Text('🍊 Tangerine', style: _style),
          Text('🍋 Lemon', style: _style),
          Text('🍌 Banana', style: _style),
          Text('🍍 Pineapple', style: _style),
          Text('🥭 Mango', style: _style),
          Text('🍎 Red Apple', style: _style),
          Text('🍏 Green Apple', style: _style),
        ],
      ),
    );
  }
}
How to Use ListView.builder() in Flutter?
For creating ListView using builder parameters we use ListView.builder. This method of creating ListView is performance friendly because it creates ListView children’s widgets lazily.
First, let’s create a dart text list and call it fruits.
List<String> fruits = [
  '🍇 Grapes',
  '🍈 Melon',
  '🍉 Watermelon',
  '🍊 Tangerine',
  '🍋 Lemon',
  '🍌 Banana',
  '🍍 Pineapple',
  '🥭 Mango',
  '🍎 Red Apple',
  '🍏 Green Apple',
  '🍐 Pear',
  '🍑 Peach',
  '🍒 Cherries',
  '🍓 Strawberry',
  '🫐 Blueberries',
  '🥝 Kiwi Fruit',
  '🍅 Tomato',
  '🫒 Olive',
];
Now, create a ListView.builder()
ListView.builder(
            itemCount: fruits.length,
            itemBuilder: (context, index) {

             //Here you define the widget and return it
 })
You are using itemCount and itemBuilder for creating a list view.
itemCount: takes the int value and here we are giving the length of the list of the fruits.
itemBuilder: takes an anonymous function that receives context (BuildContext) and index (int) from the framework. That we can use to create each widget that ListView builds.
Create Widget for ListView.builder()
final item = Text(fruits[index], style: _style);
return item;
Here, you create a Text widget and assign it to the item variable. Inside the Text widget, you take a single value from the list of fruits for each ListView widget.
Here
index variable has incremental values from a 0 index to the fruits.length (number of elements that the fruit list has).
That’s how builder loop through each value of the list of the fruits and create a Text widget that is shown by the ListView.
_style is the style of the Text.
const _style = TextStyle(fontSize: 50);Note: return widget inside the anonymous function.
Complete ListView.builder() Widget Code:
import 'package:flutter/material.dart';

class ListViewTutorial extends StatelessWidget {
  const ListViewTutorial({Key? key}) : super(key: key);

  @override
  Widget build(BuildContext context) {
    const _style = TextStyle(fontSize: 50);
    return Scaffold(
        appBar: AppBar(
          title: const Text('CodewithHussain'),
          centerTitle: true,
        ),
        body: ListView.builder(
            itemCount: fruits.length,
            itemBuilder: (context, index) {
              final item = Text(fruits[index], style: _style);
              return item;
            })
        );
  }
}

List<String> fruits = [
  '🍇 Grapes',
  '🍈 Melon',
  '🍉 Watermelon',
  '🍊 Tangerine',
  '🍋 Lemon',
  '🍌 Banana',
  '🍍 Pineapple',
  '🥭 Mango',
  '🍎 Red Apple',
  '🍏 Green Apple',
  '🍐 Pear',
  '🍑 Peach',
  '🍒 Cherries',
  '🍓 Strawberry',
  '🫐 Blueberries',
  '🥝 Kiwi Fruit',
  '🍅 Tomato',
  '🫒 Olive',
];
How to User ListView.separated() in Flutter?
ListView.separated is also used builder method for creating ListView. Like Listview.builder, it also builds each element widget using index.
But,
You can specify separatorBuilder inside ListView.separated. separatorBuilder is used to add any kind of separator widget, here in this example we add a Divider widget as a separator.
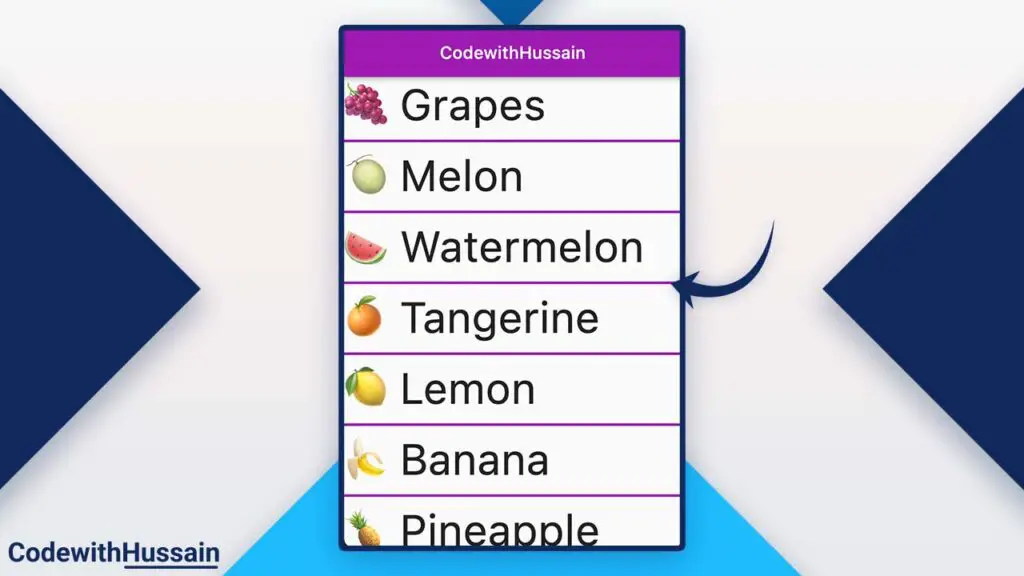
You can see the purple divider line. You can create this line by using Divider widget.
const Divider(
  thickness: 3,
  color: Colors.purple,
);
Now let’s see how you can create this list view with a divider line.
Basic Implementation of ListView.separated()
These are the basic things that you need to add to create ListView.separated().
ListView.separated(
          itemCount: //length of the list,
          itemBuilder: (context, index) {
            //each individual widget that we build in list
          },
          separatorBuilder: (context, index) {
            //Separator that is used to add line
          },
        )
ListView.separated() Example
Here you will also create a list of strings.
List<String> fruits = [
  '🍇 Grapes',
  '🍈 Melon',
  '🍉 Watermelon',
  '🍊 Tangerine',
  '🍋 Lemon',
  '🍌 Banana',
  '🍍 Pineapple',
  '🥭 Mango',
  '🍎 Red Apple',
  '🍏 Green Apple',
  '🍐 Pear',
  '🍑 Peach',
  '🍒 Cherries',
  '🍓 Strawberry',
  '🫐 Blueberries',
  '🥝 Kiwi Fruit',
  '🍅 Tomato',
  '🫒 Olive',
];
Then you will have the ListViewTutorial widget which has Scaffold that represents the screen.
class ListViewTutorial extends StatelessWidget {
  const ListViewTutorial({Key? key}) : super(key: key);

  @override
  Widget build(BuildContext context) {
    const _style = TextStyle(fontSize: 50);
    return Scaffold(
        appBar: AppBar(
          title: const Text('CodewithHussain'),
          centerTitle: true,
        ),
        body: //Here you specify the List
  }
}
You create the screen, where inside the build method you define the _style which will increase the size of each child of the list view.
Then you create AppBar for the app.
Inside the body, you will create the list view which has a separator.
ListView.separated(
          itemCount: fruits.length,
          itemBuilder: (context, index) {
            final item = Text(fruits[index], style: _style);
            return item;
          },
          separatorBuilder: (context, index) {
            return const Divider(
              thickness: 3,
              color: Colors.purple,
            );
          },
        )
      );
ListView.separated will take the itemCount, itemBuilder, and separatorBuilder.
| Property | Description |
|---|---|
| itemCount | You assign (fruits.length) which is the length of the list of fruits that we have created before. |
| itemBuilder | Here you pass an anonymous function that receives the context and index that you receive to produce the Text widget and return that widget. |
| separatorBuilder | Here you use the above define Divider widget and return it. You can use it to insert ads inside the ListView. |
Complete Example Code:
import 'package:flutter/material.dart';

class ListViewTutorial extends StatelessWidget {
  const ListViewTutorial({Key? key}) : super(key: key);

  @override
  Widget build(BuildContext context) {
    const _style = TextStyle(fontSize: 50);
    return Scaffold(
        appBar: AppBar(
          title: const Text('CodewithHussain'),
          centerTitle: true,
        ),
        body: ListView.separated(
          itemCount: fruits.length,
          itemBuilder: (context, index) {
            final item = Text(fruits[index], style: _style);
            return item;
          },
          separatorBuilder: (context, index) {
            return const Divider(
              thickness: 3,
              color: Colors.purple,
            );
          },
        )
      );
  }
}
List<String> fruits = [
  '🍇 Grapes',
  '🍈 Melon',
  '🍉 Watermelon',
  '🍊 Tangerine',
  '🍋 Lemon',
  '🍌 Banana',
  '🍍 Pineapple',
  '🥭 Mango',
  '🍎 Red Apple',
  '🍏 Green Apple',
  '🍐 Pear',
  '🍑 Peach',
  '🍒 Cherries',
  '🍓 Strawberry',
  '🫐 Blueberries',
  '🥝 Kiwi Fruit',
  '🍅 Tomato',
  '🫒 Olive',
];
How to use ListView.custom() in Flutter?
It’s time to see ListView.custom which you can use to customize the list view by adding custom functionality.
Let’s see its basic implementation.
Basic Implementation of ListView.custom()
Here childrenDelegate is a required property. And of course, you can pass the length of the list inside the childCount.
ListView.custom(
        childrenDelegate: // Here you pass SliverChildDelegate,
          childCount: //length of the List,
        ),
childrenDelegate will take SliverChildDelegate which is an abstract type. There are two implementors SliverChildDelegate that you can pass to the childrenDelegate property.
- SliverChildBuilderDelegate
- SliverChildListDelegate
ListView.custom() with SliverChildBuilderDelegate Example
In this example of ListView.custom() you will use SliverChildBuilderDelegate to produce children for a list view which is a sliver list.
If you have a question what is the difference between ListView and SliverList?
The short answer is: there is no difference.
import 'package:flutter/gestures.dart';
import 'package:flutter/material.dart';

class ListViewTutorial extends StatelessWidget {
  const ListViewTutorial({Key? key}) : super(key: key);

  @override
  Widget build(BuildContext context) {
    const _style = TextStyle(fontSize: 50);
    return Scaffold(
      appBar: AppBar(
        title: const Text('CodewithHussain'),
        centerTitle: true,
      ),
      body: ListView.custom(
        childrenDelegate: SliverChildBuilderDelegate(
          (BuildContext context, index) {
            final item = Text(fruits[index], style: _style);
            return item;
          },
          childCount: fruits.length,
        ),
      ),
    );
  }
}

List<String> fruits = [
  '🍇 Grapes',
  '🍈 Melon',
  '🍉 Watermelon',
  '🍊 Tangerine',
  '🍋 Lemon',
  '🍌 Banana',
  '🍍 Pineapple',
  '🥭 Mango',
  '🍎 Red Apple',
  '🍏 Green Apple',
  '🍐 Pear',
  '🍑 Peach',
  '🍒 Cherries',
  '🍓 Strawberry',
  '🫐 Blueberries',
  '🥝 Kiwi Fruit',
  '🍅 Tomato',
  '🫒 Olive',
];Preview:
Horizontal ListView VS Vertical ListView
You can create list views horizontally and vertically.
- Horizontal ListView
- Vertical ListView
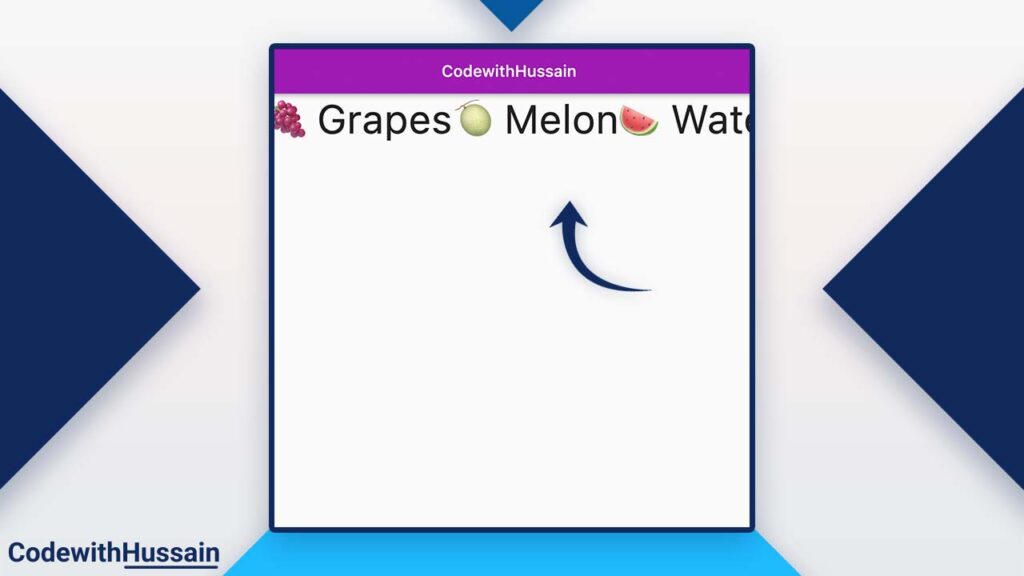
How to create Horizontal ListView?
You can create a horizontal list view by passing the scrollDirection value to Axis.horizontal. This will convert the Vertical ListView to the Horizontal ListView.
Example Complete Code
import 'package:flutter/gestures.dart';
import 'package:flutter/material.dart';

class ListViewTutorial extends StatelessWidget {
  const ListViewTutorial({Key? key}) : super(key: key);

  @override
  Widget build(BuildContext context) {
    const _style = TextStyle(fontSize: 50);
    return Scaffold(
      appBar: AppBar(
        title: const Text('CodewithHussain'),
        centerTitle: true,
      ),
      body:ListView(
        scrollDirection: Axis.horizontal,
        children: const [
          Text('🍇 Grapes', style: _style),
          Text('🍈 Melon', style: _style),
          Text('🍉 Watermelon', style: _style),
          Text('🍊 Tangerine', style: _style),
          Text('🍋 Lemon', style: _style),
          Text('🍌 Banana', style: _style),
          Text('🍍 Pineapple', style: _style),
          Text('🥭 Mango', style: _style),
          Text('🍎 Red Apple', style: _style),
          Text('🍏 Green Apple', style: _style),
          Text('🍇 Grapes', style: _style),
          Text('🍈 Melon', style: _style),
          Text('🍉 Watermelon', style: _style),
          Text('🍊 Tangerine', style: _style),
          Text('🍋 Lemon', style: _style),
          Text('🍌 Banana', style: _style),
          Text('🍍 Pineapple', style: _style),
          Text('🥭 Mango', style: _style),
          Text('🍎 Red Apple', style: _style),
          Text('🍏 Green Apple', style: _style),
        ],
      ),
    );
  }
}
Preview:
How to create a Vertical ListView?
By default, Flutter creates ListView in the vertical direction because the default scrollDirection value is Axis.vertical.
You can explicitly specify this value by giving scrollDirection an Axis.vertical value.
Example Code:
import 'package:flutter/gestures.dart';
import 'package:flutter/material.dart';

class ListViewTutorial extends StatelessWidget {
  const ListViewTutorial({Key? key}) : super(key: key);

  @override
  Widget build(BuildContext context) {
    const _style = TextStyle(fontSize: 50);
    return Scaffold(
      appBar: AppBar(
        title: const Text('CodewithHussain'),
        centerTitle: true,
      ),
      body: ListView(
        scrollDirection: Axis.vertical,
        children: const [
          Text('🍇 Grapes', style: _style),
          Text('🍈 Melon', style: _style),
          Text('🍉 Watermelon', style: _style),
          Text('🍊 Tangerine', style: _style),
          Text('🍋 Lemon', style: _style),
          Text('🍌 Banana', style: _style),
          Text('🍍 Pineapple', style: _style),
          Text('🥭 Mango', style: _style),
          Text('🍎 Red Apple', style: _style),
          Text('🍏 Green Apple', style: _style),
          Text('🍇 Grapes', style: _style),
          Text('🍈 Melon', style: _style),
          Text('🍉 Watermelon', style: _style),
          Text('🍊 Tangerine', style: _style),
          Text('🍋 Lemon', style: _style),
          Text('🍌 Banana', style: _style),
          Text('🍍 Pineapple', style: _style),
          Text('🥭 Mango', style: _style),
          Text('🍎 Red Apple', style: _style),
          Text('🍏 Green Apple', style: _style),
        ],
      ),
    );
  }
}
Preview:

Conclusion:
You learn how you can use Flutter ListView() widget. You also learn about ListView.builder(), ListView.separated() and ListView.custom() in detail with examples. Also, you explored some tips and basic use cases of Flutter ListView.
You can find more:
- Flutter SizedBox Widget
- Flutter Shimmer Effect
- Flutter Image Picker
- Flutter SnackBar
- Flutter SVGs
- Flutter Toast
Hope you like this Flutter tutorial. Thanks!