These days apps have the ability to pick images from the OS. Let’s say you have an Android app and you want to pick images from the Android system. How can you pick images in the flutter framework?
You will create an app that picks an image and show it to the UI screen.
In this Article
Use Flutter Image Picker Package
For adding image picking functionality. You have to use the image_picker package.
For that, you need to install the image_picker.
You can add it by running this command in the command prompt.
flutter pub add image_pickerOr you can add it directly to the dependencies
dependencies:
  image_picker: ^0.8.5+3
After adding dependencies, you have to import the image_picker package inside your flutter app.
import 'package:image_picker/image_picker.dart';Flutter Image Picker Example
Now you create a sample app in which you use the image picker package in Flutter.
First, you will create two buttons (“Choose Image”, and “Take Photos”).
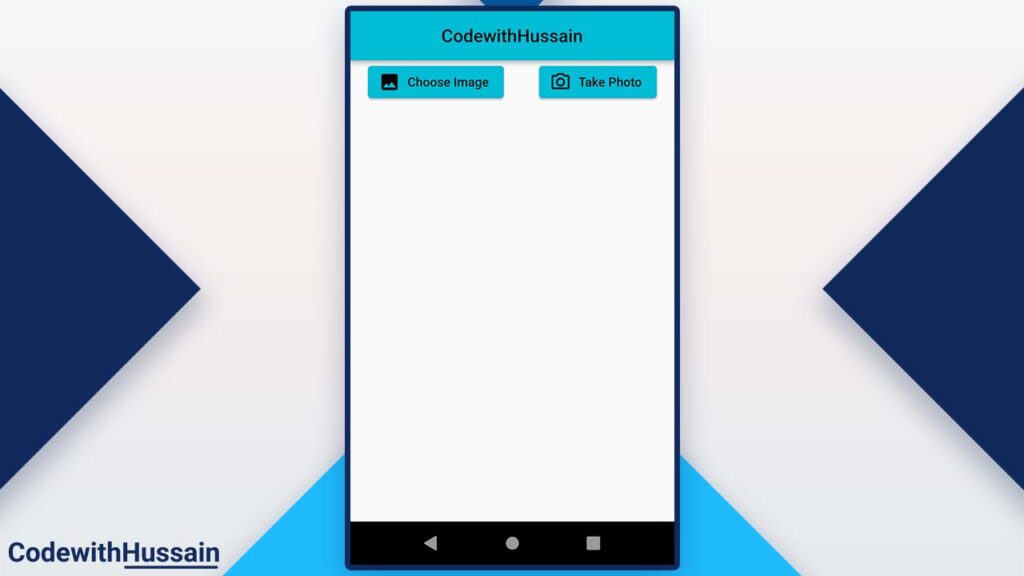
Choose Image: When you top on the choose image button you will be able to browse images from your directory or gallery and pick images from there.
Take Photo: You can tap on this button to take photos from the camera and select the image from there.
Code:
Row(
  mainAxisAlignment: MainAxisAlignment.spaceAround,
  children: [
    ElevatedButton.icon(
      onPressed: () async {

      },
      label: const Text('Choose Image'),
      icon: const Icon(Icons.image),
    ),
    ElevatedButton.icon(
      onPressed: () async {

      },
      label: const Text('Take Photo'),
      icon: const Icon(Icons.camera_alt_outlined),
    ),
  ],
),
You wrap these buttons inside the Row() widget.
For showing an image on the screen you have to update the state of the UI. For that reason, you will use a stateful widget and add these buttons right there.
You will import the dart:io.
and package:image_picker/image_picker.dart inside the screen.
After that, you will create an XFile (variable type from the image_picker) nullable state variable.
import 'dart:io';

import 'package:flutter/material.dart';
import 'package:image_picker/image_picker.dart';

class ImagePickerScreen extends StatefulWidget {
  const ImagePickerScreen({Key? key}) : super(key: key);

  @override
  State<ImagePickerScreen> createState() => _ImagePickerScreenState();
}

class _ImagePickerScreenState extends State<ImagePickerScreen> {
  XFile? image; //this is the state variable
  @override
  Widget build(BuildContext context) {
    return Scaffold(
      appBar: AppBar(
        centerTitle: true,
        title: const Text('CodewithHussain'),
      ),
      body: Column(
        children: [
          Row(
            mainAxisAlignment: MainAxisAlignment.spaceAround,
            children: [
              ElevatedButton.icon(
                onPressed: () async {

                },
                label: const Text('Choose Image'),
                icon: const Icon(Icons.image),
              ),
              ElevatedButton.icon(
                onPressed: () async {

                },
                label: const Text('Take Photo'),
                icon: const Icon(Icons.camera_alt_outlined),
              ),
            ],
          ),
          //check the image state and
          //update the UI
          if (image != null)
            Expanded(
              child: Column(
                children: [
                  //This will show image on to the screen
                  Expanded(child: Image.file(File(image!.path))),

                  //This will remove image from the UI
                  ElevatedButton.icon(
                    onPressed: () {

                    },
                    label: const Text('Remove Image'),
                    icon: const Icon(Icons.close),
                  )
                ],
              ),
            )
          else
            const SizedBox(),
        ],
      ),
    );
  }
}
You can see at the end of the screen we are checking if the image is null don’t show anything and if the image has some value show it to the screen.
Let’s implement the methods
Choose Image
Here you first create an ImagePicker variable _picker (You can also initialize it inside the initState() ).
Then you use the pickImage() method from the _picker.
pickImage() will take the ImageSource.gallery.
Which will open a gallery when you press this button and from the gallery, you can select an image and assign it to the img variable.
final img =
        await _picker.pickImage(source: ImageSource.gallery);
also set the state
 setState(() {
      image = img;
    });
Check button code:
ElevatedButton.icon(
  onPressed: () async {
    final ImagePicker _picker = ImagePicker();
    final img =
        await _picker.pickImage(source: ImageSource.gallery);
    setState(() {
      image = img;
    });
  },
  label: const Text('Choose Image'),
  icon: const Icon(Icons.image),
),
Check Preview:
Remove Image Button
You can remove the image from the UI using the remove image button.
ElevatedButton.icon(
  onPressed: () {
    setState(() {
      image = null; //this is important
    });
  },
  label: const Text('Remove Image'),
  icon: const Icon(Icons.close),
)
You simply set the state to the null and UI will set the state automatically.
Now let’s take photos from camera.
Take Photo From Camera
You can use image_picker to also take photos from the camera.
Let’s see
Here you will also create _picker variable and img variable to hold the image in the memory.
Then you inside the pickImage()you simply change the ImageSource to the camera.
final img =
        await _picker.pickImage(source: ImageSource.camera);
this will do the work automatically and open the camera app in which you can take a photo.
And select that photo by pressing the tick button at the bottom of the UI.
after that, you will set the state variable with the value that you receive from the camera app.
ElevatedButton.icon(
  onPressed: () async {
    final ImagePicker _picker = ImagePicker();
    final img =
        await _picker.pickImage(source: ImageSource.camera);
    setState(() {
      image = img;
    });
  },
  label: const Text('Take Photo'),
  icon: const Icon(Icons.camera_alt_outlined),
),Preview:

You can use the camera app to easily pick images from the camera.
Complete Code:
import 'dart:io';

import 'package:flutter/material.dart';
import 'package:image_picker/image_picker.dart';

class ImagePickerScreen extends StatefulWidget {
  const ImagePickerScreen({Key? key}) : super(key: key);

  @override
  State<ImagePickerScreen> createState() => _ImagePickerScreenState();
}

class _ImagePickerScreenState extends State<ImagePickerScreen> {
  XFile? image;
  @override
  Widget build(BuildContext context) {
    return Scaffold(
      appBar: AppBar(
        centerTitle: true,
        title: const Text('CodewithHussain'),
      ),
      body: Column(
        children: [
          Row(
            mainAxisAlignment: MainAxisAlignment.spaceAround,
            children: [
              ElevatedButton.icon(
                onPressed: () async {
                  final ImagePicker _picker = ImagePicker();
                  final img =
                      await _picker.pickImage(source: ImageSource.gallery);
                  setState(() {
                    image = img;
                  });
                },
                label: const Text('Choose Image'),
                icon: const Icon(Icons.image),
              ),
              ElevatedButton.icon(
                onPressed: () async {
                  final ImagePicker _picker = ImagePicker();
                  final img =
                      await _picker.pickImage(source: ImageSource.camera);
                  setState(() {
                    image = img;
                  });
                },
                label: const Text('Take Photo'),
                icon: const Icon(Icons.camera_alt_outlined),
              ),
            ],
          ),
          if (image != null)
            Expanded(
              child: Column(
                children: [
                  Expanded(child: Image.file(File(image!.path))),
                  ElevatedButton.icon(
                    onPressed: () {
                      setState(() {
                        image = null;
                      });
                    },
                    label: const Text('Remove Image'),
                    icon: const Icon(Icons.close),
                  )
                ],
              ),
            )
          else
            const SizedBox(),
        ],
      ),
    );
  }
}
Conclusion:
You learn how to use an image picker to pick images on Android and IOS devices.
Read more:
- How to create SnackBar in Flutter
- How to use SVGs in Flutter
- How to use Hex Color Codes in Flutter
- How to change the App package name in Flutter
- How to disable the keyboard when tapping outside the TextField
- How to place ListView inside Column
I hope this flutter tutorial solves your problem. Thanks!