Today you will learn how you can easily change the Android minSdkVersion in Flutter for both (Before 2.8 Update and After Flutter 2.8 Update) versions.
In this Article
Step 1: Find local.properties Folder
project_folder/android/local.propertiesStep 2: Add the following lines
flutter.minSdkVersion=21Step 3: Open build.gradle file
project_folder/android/app/build.gradleStep 4: Update minsdkVersion inside defaultConfig section
localProperties.getProperty(‘flutter.minSdkVersion’).toInteger()Step 5: Clean the flutter project
Inside the terminal, run the flutter clean command.
flutter cleanStep 6: Re build you app.
Your Android minSdkVersion will be changed.
Example:
local.properties
sdk.dir=/Users/HussainHumdani/Library/Android/sdk
flutter.sdk=/Users/HussainHumdani/development/flutter
flutter.minSdkVersion=21 #here you add the minSdkVersion
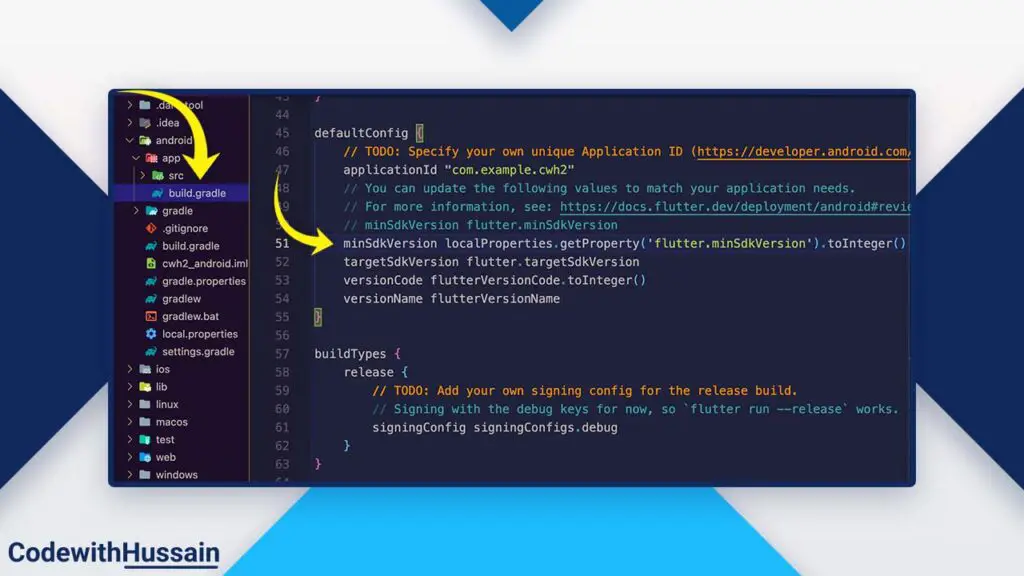
build.gradle File (android/app/build.gradle)
    defaultConfig {
        // TODO: Specify your own unique Application ID (https://developer.android.com/studio/build/application-id.html).
        applicationId "com.example.cwh2"
        // You can update the following values to match your application needs.
        // For more information, see: https://docs.flutter.dev/deployment/android#reviewing-the-build-configuration.
        // minSdkVersion flutter.minSdkVersion        Old Line
        minSdkVersion localProperties.getProperty('flutter.minSdkVersion').toInteger() //New Line
        targetSdkVersion flutter.targetSdkVersion
        versionCode flutterVersionCode.toInteger()
        versionName flutterVersionName
    }
Project Created Before 2.8 Update
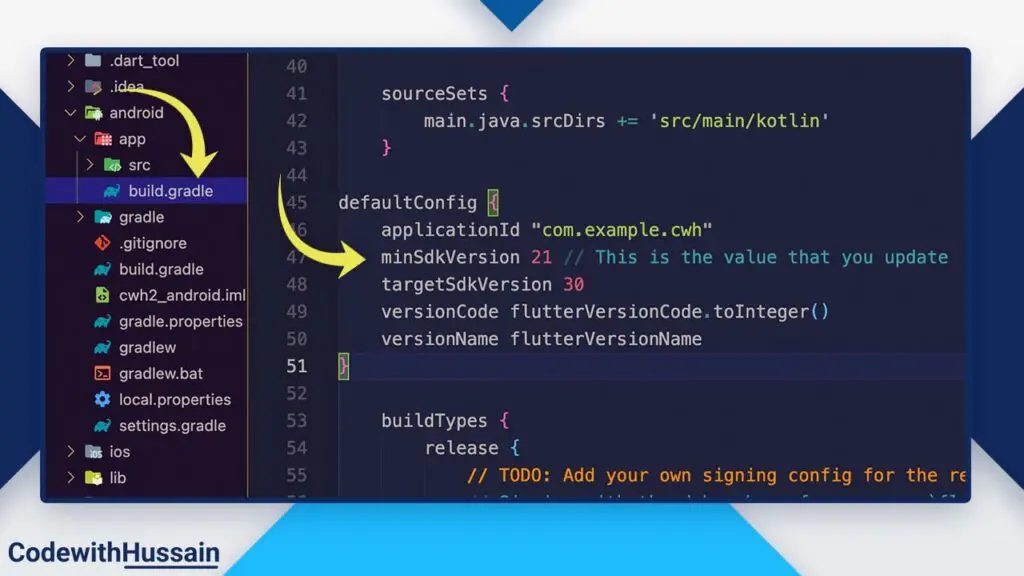
Step 1: Go to the build.gradle file
project_folder/android/app/build.gradleStep 2: Find defaultConfig and update minSdkVersion
defaultConfig {
    applicationId "com.example.cwh"
    minSdkVersion 21 // This is the value that you update
    targetSdkVersion 30
    versionCode flutterVersionCode.toInteger()
    versionName flutterVersionName
}
Step 3: Clean the flutter project
Clean the flutter project by running this command in the command prompt.
flutter cleanStep 4: Re-build your flutter app.
Now your android minSdkVersion will be updated.
Conclusion
Hope you understand the process of changing android minSdkVersion in Flutter. See more
I hope you like this flutter tutorial thanks!