You will learn how to use the AnimatedBuilder widget in your flutter app.
AnimatedBuilder is part of the Flutter animation framework.
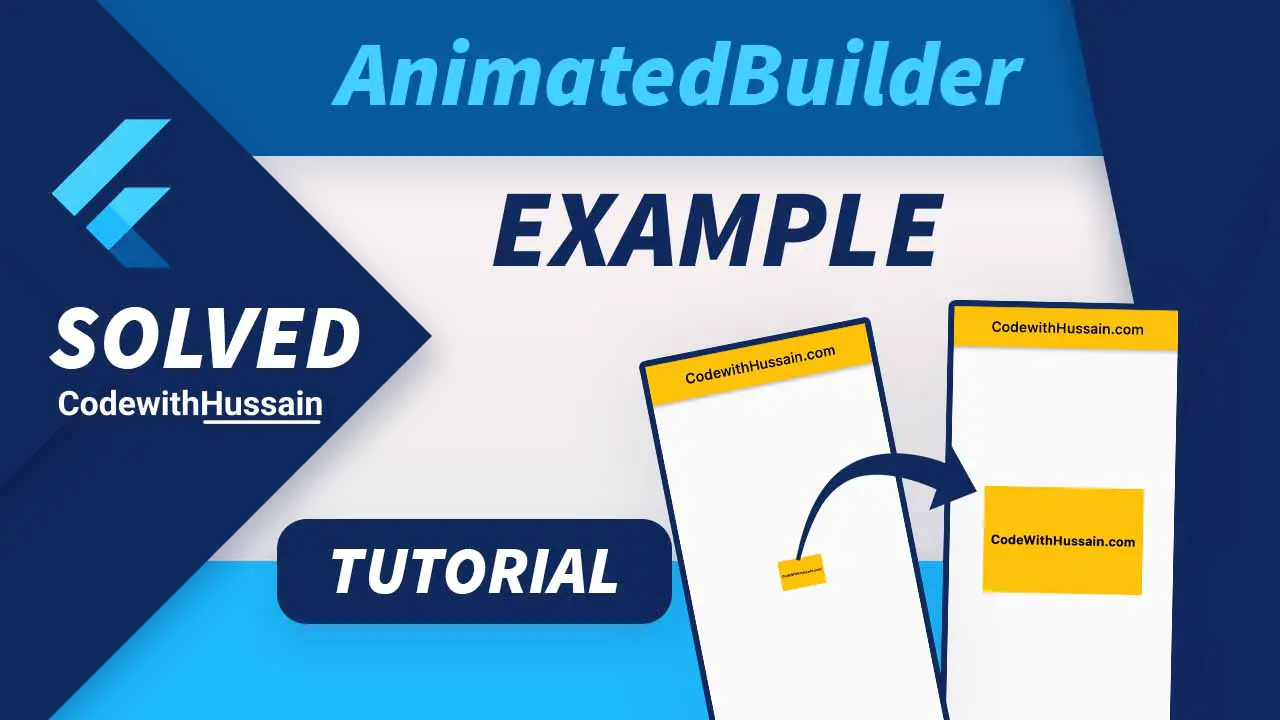
Let’s see what you are building in this Flutter example.
In this Article
Example App Preview

Example Complete Code
import 'package:flutter/material.dart';

import 'season 3/flutter_animated_builder.dart';

void main() {
  runApp(const MyApp());
}

class MyApp extends StatelessWidget {
  const MyApp({Key? key}) : super(key: key);

  @override
  Widget build(BuildContext context) {
    return MaterialApp(
      theme: ThemeData(primarySwatch: Colors.amber),
      debugShowCheckedModeBanner: false,
      home: const AnimatedBuilderScreen(),
    );
  }
}
import 'package:flutter/material.dart';

class AnimatedBuilderScreen extends StatefulWidget {
  const AnimatedBuilderScreen({Key? key}) : super(key: key);

  @override
  State<AnimatedBuilderScreen> createState() => _AnimatedBuilderScreenState();
}

class _AnimatedBuilderScreenState extends State<AnimatedBuilderScreen>
    with TickerProviderStateMixin {
  late AnimationController _controller;

  @override
  void initState() {
    super.initState();

    _controller = AnimationController(
      duration: const Duration(seconds: 2),
      vsync: this,
    )..repeat();
  }

  @override
  Widget build(BuildContext context) {
    return Scaffold(
      appBar: AppBar(
        title: const Text('CodewithHussain.com'),
      ),
      body: Center(
        child: AnimatedBuilder(
          animation: _controller,
          child: Container(
            width: 300.0,
            height: 200.0,
            color: Colors.amber,
            child: const Center(
              child: Text(
                'CodeWithHussain.com',
                style: TextStyle(
                  color: Colors.black,
                  fontWeight: FontWeight.bold,
                  fontSize: 24,
                ),
              ),
            ),
          ),
          builder: (BuildContext context, Widget? child) {
            return Transform.scale(
              scale: _controller.value,
              child: child,
            );
          },
        ),
      ),
    );
  }

  @override
  void dispose() {
    _controller.dispose();

    super.dispose();
  }
}
Example Explanation
Step 1: Create a Stateful widget
You can manage the state of the widget as you want. But here we use Stateful widget to manage the application state.
class AnimatedBuilderScreen extends StatefulWidget {
  const AnimatedBuilderScreen({Key? key}) : super(key: key);

  @override
  State<AnimatedBuilderScreen> createState() => _AnimatedBuilderScreenState();
}

class _AnimatedBuilderScreenState extends State<AnimatedBuilderScreen>
    with TickerProviderStateMixin {

}
Step 2: Use SingleTickerProviderStateMixin
class _AnimatedBuilderScreenState extends State<AnimatedBuilderScreen>
    with TickerProviderStateMixin {
}
SingleTickerProviderStateMixin provide a single ticker that will tick on every animation frame.
Step 3: Use AnimationController
You can use the late keyword for initializing the AnimationController later.
late AnimationController _controller;Step 4: Initialize Controller
Here we initialize the AnimationController by setting duration and vsync properties.
Also, notice the ..repeat() for looping the animation cycle.
  @override
  void initState() {
    super.initState();

    _controller = AnimationController(
      duration: const Duration(seconds: 2),
      vsync: this,
    )..repeat();
  }
Step 5: Use Controller inside AnimationBuilder
We pass the _controller to the animation property.
AnimatedBuilder(
          animation: _controller,
          child: Container(
            width: 300.0,
            height: 200.0,
            color: Colors.amber,
            child: const Center(
              child: Text(
                'CodeWithHussain.com',
                style: TextStyle(
                  color: Colors.black,
                  fontWeight: FontWeight.bold,
                  fontSize: 24,
                ),
              ),
            ),
          ),
          builder: (BuildContext context, Widget? child) {
            return Transform.scale(
              scale: _controller.value,
              child: child,
            );
          },
        ),
We have given AnimatedBuilder an optional child who will optimize the AnimatedBuilder in this example.
This child will render itself independently from the animation.
Step 6: Release Resources
Remember to release resources by using dispose() from the StatefulWidget.
  @override
  void dispose() {
    _controller.dispose();

    super.dispose();
  }
Conclusion
In this AnimatedBuilder example, you just learn how you can use a Stateful widget for animation.
You animate the scale transformation in this Flutter example. You can check the official docs.
See more
- Flutter SliverGrid Example
- Show loading dialog in Flutter
- Get device id in Flutter
- How to create expansion tile in the flutter
- Flutter ListView Widget
Hope you like this tutorial! Thanks