In this Article
What is TextOverflow Error in Flutter?
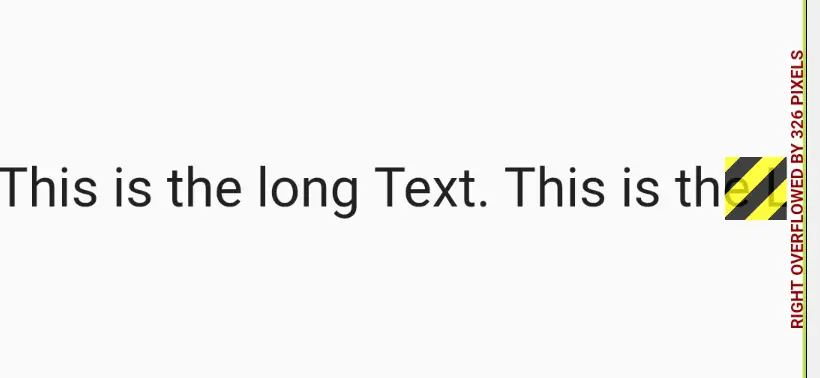
Flutter TextOverflow is an error in which Renderflex is overflowing and also marked as yellow and black striped pattern after rendering.
Renderflex is a class of flutter framework which display children in a one-dimension array.
This error indicate that there is some content on the screen that cannot be seen by the app user.
When Text Overflow Error Occurs
Overflow error is caused by when content is too big for the RenderFlex.
And
TextOverflow error is showing when text is too big for the renderflex one-dimensional array.
Example: How to produce TextOverflow Exception
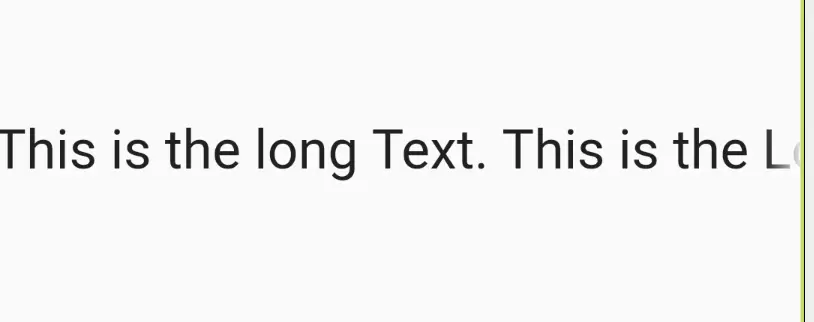
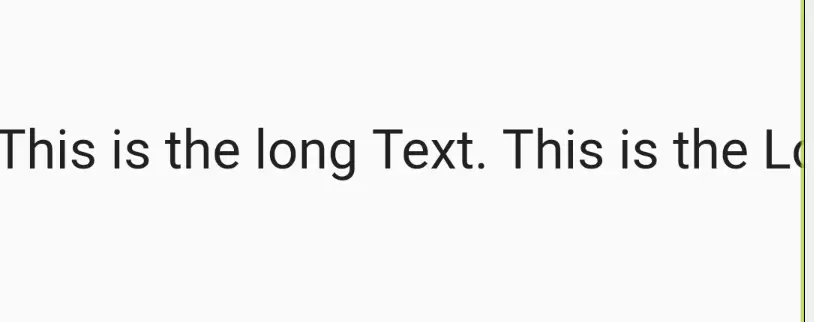
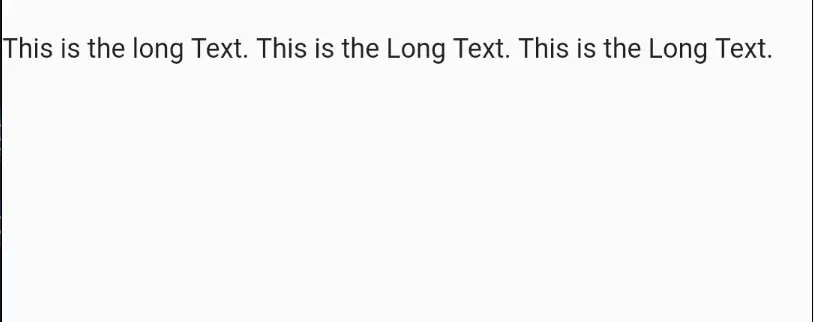
If we put a really long text inside the row. And try to build the application.
You see the assertion in the console
A RenderFlex overflowed by 40 pixels on the right.
Here 40 is just a number it could be any number in your case
Code:
Row(
children: const [
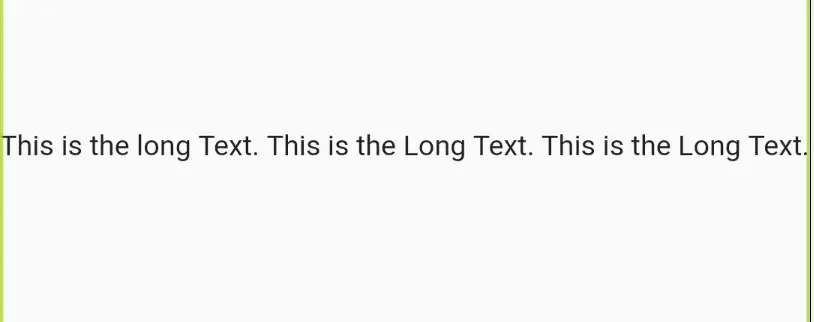
Text(
'This is the long Text. This is the Long Text. This is the Long Text.'),
],
),
Methods to Solve TextOverflow Error
Top 13 methods to remove TextOverflow Problem.
Use Expanded Widget (Make Multiline Text)
Inside the assertion Flutter framework tell us a solution.
Consider applying a flex factor (e.g. using an Expanded widget) to force the children of the RenderFlex to fit within the available space instead of being sized to their natural size.
So we get an idea that Expanded widget can solve this problem.
Before:
Scaffold(
      body: SafeArea(
        child: Padding(
          padding: const EdgeInsets.symmetric(vertical: 100), //0
          child: Row(
            children: const [
              Text(
                'This is the long Text. This is the Long Text. This is the Long Text.',
                style: TextStyle(fontSize: 24), //1
              ),
            ],
          ),
        ),
      ),
    );
0 – Add vertical space by using padding widget
1 – Increase the size of the Text by using TextStyle inside the Text widget
Solution:
Let’s use the Expanded widget.
Scaffold(
      body: SafeArea(
        child: Padding(
          padding: const EdgeInsets.symmetric(vertical: 100),//0
          child: Row(
            children: const [
              Expanded(   //2
                child: Text(
                  'This is the long Text. This is the Long Text. This is the Long Text.',
                  style: TextStyle(fontSize: 24), //1
                ),
              ),
            ],
          ),
        ),
      ),
    );
2 – Wrap the Text widget inside Expanded widget.
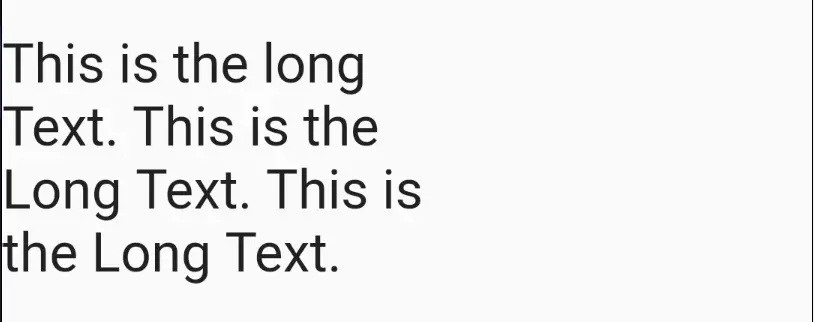
Expanded widget force the children of RenderFlex to fit within the available space.
As a result our error is gone and Text is shown in two lines.

Use Flexible Widget
Just like Expanded widget we can also use the Flexible Widget of Flutter.
This will also give flexibility to the child to expand in the available space. Like
Example Code Snippet
Row(
            children: const [
              Flexible(
                child: Text(
                  'This is the long Text. This is the Long Text. This is the Long Text.',
                  style: TextStyle(fontSize: 24),
                ),
              ),
            ],
          ),
Visually we see the same result as the Expanded. Text will be shown in two lines.
Make Single line Text
We can limit this large text to a single line by setting maxLines property to 1.
Also remember to wrap Text inside the Expanded widget.
This will clip (Or hide) the text at the end of the line.

What is Text maxLines property?
Text widget maxLines property explicitly show the text in the specified lines. It will also truncate the extra text according to overflow property.
What is Text overflow property?
Text widget overflow property will specify how overflow should look like. It takes the TextOverflow enum value.
What is Text softWrap property?
According to the docs
“Whether the text should break at soft line breaks.”
softWrap can be true or false.
softWrap true tells the system that text glyphs are dealing with vertical space.
softWrap false tells the system that text glyphs have a kind of unlimited horizontal space.
We use this softWrap while explaining the bellow section.
What is TextOverflow enum?
There are four enums inside the flutter TextOverflow enum.
a. TextOverflow.clip
This will clip the extra overflow text that is outside the FlexBox.
TextOverflow.clip Example Code Snippet
    Row(
                children: const [
                  Expanded(
                    child: Text(
                      'This is the long Text. This is the Long Text. This is the Long Text.',
                      style: TextStyle(fontSize: 24),
                      maxLines: 1,
                      overflow: TextOverflow.clip,
                    ),
                  ),
                ],
              ),
Preview Screenshot:
b. TextOverflow.fade
This will just give the fade effect from visible to decrease the opacity and become transparent.
TextOverflow.fade Example without using softWrap
    Row(
                children: const [
                  Expanded(
                    child: Text(
                      'This is the long Text. This is the Long Text. This is the Long Text.',
                      style: TextStyle(fontSize: 24),
                      maxLines: 1,
                      overflow: TextOverflow.fade,
                    ),
                  ),
                ],
              ),
But this will produce different result. Like
Preview

Let’s use softWrap
TextOverflow.fade Example with softWrap
Row(
                children: const [
                  Expanded(
                    child: Text(
                      'This is the long Text. This is the Long Text. This is the Long Text.',
                      style: TextStyle(fontSize: 24),
                      maxLines: 1,
                      overflow: TextOverflow.fade,
                      softWrap: false, //0
                    ),
                  ),
                ],
              ),
0 – Here we set the softWrap value false which will tell the system that there is unlimited horizontal Text.
Preview
Now you can see the result that we want. Text is showing
fade
effect at the end of the single line.
c. TextOverflow.ellipsis
This will show ellipsis (...) three dots at the end of the line. This shows that there is more content that is not visible due to the small space.
TextOverflow.ellipsis Example with code snippet
    Row(
                children: const [
                  Expanded(
                    child: Text(
                      'This is the long Text. This is the Long Text. This is the Long Text.',
                      style: TextStyle(fontSize: 24),
                      maxLines: 1,
                      overflow: TextOverflow.ellipsis,
                      // softWrap: false,
                    ),
                  ),
                ],
              ),
Here we just comment the softWrap property because you assign false or not assign the value the result will be same ellipses (...) at the end.
Preview

d. TextOverflow.visible
It will just show the text outside of the Container.
TextOverflow.visible with code snippet
    Row(
                children: const [
                  Expanded(
                    child: Text(
                      'This is the long Text. This is the Long Text. This is the Long Text.',
                      style: TextStyle(fontSize: 24),
                      maxLines: 1,
                      overflow: TextOverflow.visible,
                      softWrap: false,
                    ),
                  ),
                ],
              ),
Remember: Here we have to assign softWrap false value.
Otherwise it will look like a clip.
Preview
Scrollable Singleline Text (Horizontal Scroll)
We can remove flutter TextOverflow error by making it scrollable horizontally.
For that purpose we use SingleChildScrollView with its scrollDirection property.
SingleChildScrollView is a widget which creates a box in which single child widget can scroll according to flutter docs.
scrollDirection default value is an enum Axis.vertical.
Because we want to scroll in the single line then we change this scrollDirection to the Axis.horizontal.
Let’s see the code
Row(
            children: const [
              Expanded( //0
                child: SingleChildScrollView( //1
                  scrollDirection: Axis.horizontal,//2
                  child: Text(
                    'This is the long Text. This is the Long Text. This is the Long Text.',
                    style: TextStyle(fontSize: 24),
                  ),
                ),
              ),
            ],
          ),
0 – Remember that we still have wrap the SingleChildScrollView with Expanded widget. If you remove this Expanded you will get flutter overflow error.
1 – Add SingleChildScrollView
2 – Assign Scroll Direction to the single child scroll view.
Screenshot

This is a screenshot consider this Text is scrolling when we drag it. Check Bottom Video for preview
Scrollable Multiline Text (Vertical Scroll)
Let’s see how we can make the Text widget scroll vertically. Let’s first see the code
Row(
            children: const [
              Expanded(
                child: SizedBox( //1
                  height: 32,
                  child: SingleChildScrollView(
                    scrollDirection: Axis.vertical, //2
                    child: Text(
                      'This is the long Text. This is the Long Text. This is the Long Text.',
                      style: TextStyle(fontSize: 24),
                    ),
                  ),
                ),
              ),
            ],
          ),
There are few differences here.
1. We use SizedBox widget (check detail article)
Which is used to give the fix dimensions. We use the height property of SizedBox.
You can also use the Container widget here.
2. Change the scrollDirection to vertical.
This will make the text scroll vertically and our TextOverflow error is removed.
Screenshot:

Use Column Widget
Till now we are using Text inside the Row widget we we are facing the Text overflow error.
Wrap Text inside the Column widget your text overflow error will be removed.
Column(
            mainAxisSize: MainAxisSize.min,
            children: const [
              Text(
                'This is the long Text. This is the Long Text. This is the Long Text.',
                style: TextStyle(fontSize: 24),
              ),
            ],
          ),
Preview

But
We you wrap your Column inside the Row widget you will again Get the Overflow error.
No problem solution is simple
Row(
            children: [
              Expanded( //1
                child: Column(
                  mainAxisSize: MainAxisSize.min,
                  children: const [
                    Text(
                      'This is the long Text. This is the Long Text. This is the Long Text.',
                      style: TextStyle(fontSize: 24),
                    ),
                  ],
                ),
              ),
            ],
          ),
1. Just wrap the Column inside the Expanded it will remove the Row Overflow error.
And the result will be same
Preview
Give Fix Height SizedBox
You can easily solve the text overflow problem by using the Flutter SizedBox Widget(again you can check the detail article).
Code Example
Row(
            children: const[
              SizedBox(          //1
                width: 300,      //2
                child: Text(
                  'This is the long Text. This is the Long Text. This is the Long Text.',
                  style: TextStyle(fontSize: 24),
                ),
              ),
            ],
          ),
1. Here we just wrap the Text widget inside the SizedBox.
2. Then we give the fix width value 300.
As a result our text overflow error is gone because now Text is arranging itself according to the given constraints of the SizedBox.
Preview

Shrink Text (Using FittedBox)
Shrink Text method will shrink the text inside the given constraints and remove the overflow error.
We use the FittedBox widget here.
What is Flutter FittedBox?
It’s a widget which will scale and position its child within itself.
Let’s remove the text overflow by using FittedBox
Row(
            children: const [
              Expanded(
                child: FittedBox( //1
                  child: Text(
                    'This is the long Text. This is the Long Text. This is the Long Text.',
                    style: TextStyle(fontSize: 24),
                  ),
                ),
              ),
            ],
          ),
1. Just wrap the Text widget with FittedBox.
Remember to use Expanded widget inside Row.
Preview:
Use BoxConstaint with maxWidth
We can also use the Container constraints parameter. Where we can pass the BoxConstraints as an argument.
Let’s see the code
Row(
            children: [
              Container(
                constraints: const BoxConstraints(maxWidth: 200),//1
                child: const Text(
                  'This is the long Text. This is the Long Text. This is the Long Text.',
                  style: TextStyle(fontSize: 24),
                ),
              ),
            ],
          ),
1. Here we are assigning maxWidth a value of 200. This will give the constraints to the bottom Text widget and our TextOverflow problem is going to be solve.
Preview
Change Row to ListView
We can also solve the TextOverflow problem by replacing Row widget with ListView.
ListView( //1
            children: const [
              Text(
                'This is the long Text. This is the Long Text. This is the Long Text.',
                style: TextStyle(fontSize: 24),
              ),
            ],
          ),
1. As you can see ListView will automatically solve the Yellow and Black Bars which will come up when Text Overflow.
Preview

Use Dynamic Height with MediaQuery
We can also use the dynamic height From the mediaQuery to solve TextOverFlow Error.
final maxWidth = MediaQuery.of(context).size.width * 0.9; //1
    return Scaffold(
      body: SafeArea(
        child: Padding(
          padding: const EdgeInsets.symmetric(vertical: 100),
          child: Container(
            constraints: BoxConstraints(maxWidth: maxWidth),
            child: const Text(
              'This is the long Text. This is the Long Text. This is the Long Text.',
              style: TextStyle(fontSize: 24),
            ),
          ),
        ),
      ),
    );
  }
1. First we use the MediaQuery and get the width the screen and dynamically save it to the maxWidth variable then use the old container BoxConstraints method. And assign this value.
This method does not give the static constraints to the ConstraintsBox.
With change of the screen size box size will also change. And Text Overflow problem will no longer exist here.
Use Packages
We can also solve the Text Overflow problem by using different Package.
auto_size_text
We can use AutoSizeText widget. It will manage the size of the widget according to the given constraints. It will not clip the end of the sentence. It actually resize the text to solve TextOverflow problem.
You can easily install the package by running.
$ flutter pub add auto_size_textOr adding dependencie
dependencies:
  auto_size_text: ^3.0.0
But you first has to import
import 'package:auto_size_text/auto_size_text.dart';
Let’s see the example
const  Scaffold(
      body: SafeArea(
        child: Padding(
          padding: const EdgeInsets.symmetric(vertical: 100),
          child: AutoSizeText( //1
            'This is the long Text. This is the Long Text. This is the Long Text.',
            style: TextStyle(fontSize: 24),
            maxLines: 1,
          ),
        ),
      ),
    );
1. Here we use the AutoSizeText widget
See the Preview
assorted_layout_widgets
This package can also be used to solve the text overflow problem of the Text widget.
First run this command in the terminal
flutter pub add assorted_layout_widgets
Or your can manually add dependencies in the pubspec.yaml
dependencies:
  assorted_layout_widgets: ^5.6.1
Then you have to import the library
import 'package:assorted_layout_widgets/assorted_layout_widgets.dart';After that we use the TextOneLine widget to solve the TextOverflow problem.
const Scaffold(
      body: SafeArea(
        child: Padding(
          padding:  EdgeInsets.symmetric(vertical: 100),
          child: TextOneLine( //1
            'This is the long Text. This is the Long Text. This is the Long Text.',
            style: TextStyle(fontSize: 24),
          ),
        ),
      ),
    );
1. You can see the TextOneLine widget it will also add ellipses at the end of the line. And Solve the problem.
Preview

Check the previews in the video
If still facing problem this issue may be helpful
Conclusion
Hope you find something useful. Thanks!